Update!

Hi friends,

I promise I haven’t abandoned the blog! I realize it’s been a while since I last posted, but several things happened:

1) my birthday was last Sunday

2) I suddenly got bombarded with commission requests

3) I’m in the middle of like 3 different, long-term projects, so there are no pretty, posed pictures to be taken

4) BUSINESS VENTURE. I’m going to be starting a business! I’m insanely busy right now with research and figuring out the start-up costs and timeline…I’ll post news as it’s available.

It’s interesting how blogging is harder to keep up with when, technically speaking, you have more going on in your life that is blog-worthy…

Anyway, I have to run off to work, but I wanted to post the update so you all wouldn’t lose faith in me 😀

Stay tuned!

Completed: Vogue 8519, Jacket designed by Claire Schaeffer

Guys, let’s talk for a minute about the really interesting Vogue patterns. You know the ones I’m taking about: the ones with tons of seam lines, or with really unique, structural silhouettes. Usually they’re by designers or masters of the craft, like Ralph Rucci or Claire Schaeffer (two of my favorites, by the way).

Despite how cool these patterns are, and despite the fact that they’re often listed as “owned” or “wishlisted” by a lot of folks on places like Pattern Review (PR), no one ever really talks about making them up. There usually aren’t reviews for them on PR. There usually aren’t a whole lot of blog posts, if any. The only time you see them made up is for sewing conferences, and they’re on a mannequin, and usually photographed with someone’s phone. So you look at the pictures on the Vogue website, and you look at the pictures and drawings on the package, and you say to yourself, “Yeah, that’s great, but what’s it like to actually make this thing?”

Making up these challenging patterns is a mixed bag. Each designer working for Vogue approaches silhouettes, ease, and internal structure differently—and oftentimes, the way they approach these aspects of garment construction are stylized, personalized, and a total train wreck to really fit.

However, obtaining a great fit is central to having a final product that looks just as bam!-pow! As the garment photographed on the pattern package—and sometimes even better (I swear, Rebecca Taylor and Ralph Rucci NEED to send model measurements to Vogue along with their sample garments, because the Vogue models consistently don’t fit in the garments they’re wearing, and that doesn’t help sell patterns at all!).

So how do you do it?

I’d love to say “Make a muslin!” and have that be it, because that’s the big buzz on the blogosphere right now, what with the Ralph Rucci coat sewalong and people getting more and more interested in challenging sewing designs. But I think a lot of people approach muslin-making the wrong way, which makes it a step that is much less effective than it could be.

I had to make this jacket four times to get the garment you see pictured here.
purple_front

purple_back

An introduction is in order: audience, meet Vogue 8519. V8519, meet the coolest cats in the blogosphere.

The first time was a muslin. I thought I had it down after that: I did some pinning here, some marking there, and found, to my delight, that the fit seemed really good if I just took out the side panels entirely, and made almost no other adjustments other than the standard (taking in the shoulder width, because apparently Vogue designs for football players, and lengthening the arms by an inch, because I’m lanky).

So after making up this muslin, I said, hey, I got this down, now I can cut out the awesome purple leather I’ve had in my stash for a few months, and make myself a kick-butt purple leather jacket with all these cool seam details.

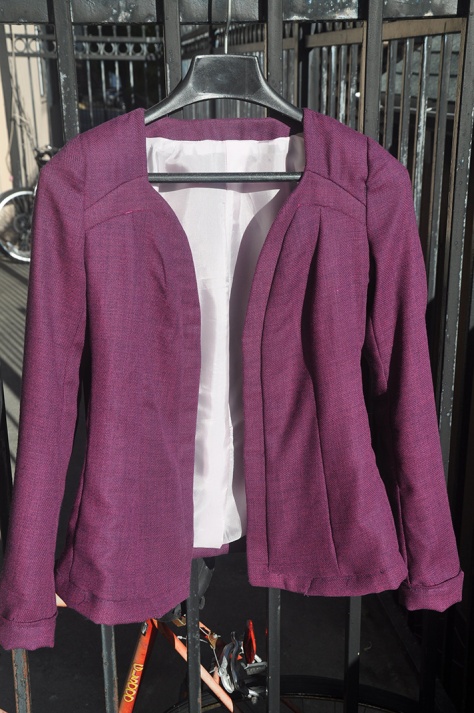
So I sewed up the bodice, left the sleeves off, and tried it on. Since it was such a disaster I couldn’t even bring up my arms enough to take a picture with my camera, I took a picture of it on a hanger instead:

DSC_0004 2

I ran into problems right away. The shoulders were still far too wide, and what was worse, the front wouldn’t fully close. On top of that, when I attached the sleeves, I found that they were way too wide, and I had almost no arm mobility: my shoulders were totally locked in by the overly-snug fit of the jacket.

Protip: if you find your shoulders are constrained, you can usually fix the problem by ensuring that the seam between the bodice and the sleeve cap rests directly over the shoulder bone (that bony bump sitting toward the end of your shoulder). So I marked where my shoulder bone was and cut the leather.

At the marking, not 5/8” beyond it.

This ruined the leather jacket, and no matter how hard I tried over the next three weeks, I could not salvage the project. Eventually, I gave up and tossed it, though it broke my heart, because that purple leather. But I had no choice—the pattern is made of so many little small pieces that I couldn’t even salvage the leather for a clutch or wallet.

But V8519 continued to nag at me. I was convinced I could get it to work, and what’s more, the spectacular failure had felt like a challenge. Like the pattern was fully expecting me to give up at that point, like it had defeated me. Claimed victory.

Well I wasn’t going to stand for that. It may have won the battle, but I was going to win the war!

I was at work when I found a bolt of burgundy wool suiting and everything started to fall into place. I had bemberg rayon at home, and I knew I had enough to make the lining for the jacket if I was clever in fitting the pieces together. I had shoulder pads and lightweight hair canvas ready for a jacket project.

THIS jacket project.

I gloated as I swept up a few yards and took it home, pretreated it, and then set to work on a third rendition of the jacket—out of cheap cotton, NOT out of the wool. I was hell-bent on getting the fit to be as close to perfect as I was humanly capable of. So I stood in front of the mirror, tweaked the fit. Tested my arm mobility. Pinned the front closed at the button marking and tried again.

Then I marked down everything I had done in a notebook, took all the adjustments out, and tried a different set of adjustments.

I did this what must have been half a dozen times, then eventually settled on the adjustments I thought would work best for me.

Then I set the muslin aside for a week, and worked on something else.

After my mind had cleared of the project, I pulled the muslin out and tried out the fit again. Took out the adjustments. Tried some of the other options. Tested some more, always watching how it looked, whether or not it hung right. I tested my mobility by windmilling my arms, bending down to pick up a pencil, reaching up to pull spices from the top shelf of the kitchen cabinet. I tried hugging my S.O. a bunch of times (he didn’t seem to mind). Punched the air as if in triumph (practice, you understand).

And then, I finally got a fit I was happy with. If you’re curious, here are some recommendations based on my work:

-the bust is actually very shaped: because of the center-front curved piece, the bust is actually able to be cupped over each breast, and this is built (somewhat) into the pattern. This pattern–as with all Vogue patterns–is meant for women with B cups, so you’ll have to be careful about how you do your FBA or SBA. Also remember that when you add/subtract space in the bust, you will have to correspondingly lengthen/shorten the top arc of the center-front curved piece, and you may also have to change the shape of the front yoke. If you’re curious, these are all adjustments that I had to make, since I always have to do an SBA.

-the pattern is designed to be a very loose fit and VERY structured—I think there are only two pieces on the bodice that aren’t supposed to be interfaced with hair canvas. I thought that the style lines suggested something more feminine, so I took everything in quite a bit, and only used hair canvas on the facings, the center-front curved piece, and the bottom hem.

-If you plan to get a tighter fit, here’s the best way to do it: look at the bust/waist/hip final measurements for each size as printed on the tissue paper. A snug-fitting jacket has about 2-3 inches of ease throughout, with a bit more ease around the hips (to enable you to sit comfortably and without the jacket doing unfashionable wrinkling, puckering, or buckling). Choose the WIDTHS of the size that gives you that 2-3 inches of ease all around, but make sure you keep the LENGTH of your true Vogue size, as based on the chart on the back of the envelope. In my case, I am usually a size 10/12, but in the bust and waist I took in the pieces to a size 6/8, left the hips a size 10 where I normally expand out to a size 12, and kept the length a size 10. (This approach also keeps things in much better proportion in the top of the jacket where all that curved-frontispiece nonsense is happening, so you have to do fewer eyeballed modifications for the FBA/SBA! 🙂 )

-Claire Schaeffer must have sloped shoulders, because her designs always call for 1” shoulder pads. I have very straight shoulders that I think are beautiful, and wearing anything substantial over them makes me look WAAAAY too ’80’s, and like I’m trying too hard to be corporate or something… So I chose raglan 1/2” shoulder pads instead, so that the shaping was more feminine and natural, but still gave the garment the structural support it needed.

-the only other stylistic change I made was to omit the front button. Honestly, it just looks a little awkward to me, and I feel like it breaks up the flow of the design as created by the seam lines and piece shapes. Not to mention I had no intention of trying to get a button hole through something that had been interfaced with hair canvas. 😛

~~~

I was absolutely terrified to start cutting the wool, once the muslin was finally finished and the changes had been transferred to the pattern pieces. Occasionally, I had to stop working on the jacket for a week or more, and sew something easy and gratifying (like the By Hand London blazer I posted a few days ago!), because the anxiety over this project was killing me.

But! I’m happy to say that after over a month of fiddling with this pattern, I got something that fit well, and the final result is a bam!-pow! rendition of V8519 that I’m very proud of, and will be wearing a hell of a lot.

purple_1

purple_2

It is so rewarding to see something like this grow beneath my hands, and to be able to wear it is…inspiring (not to mention I feel like a million bucks wearing such a unique and TAILORED jacket!). I can confidently take the next step and try things that are even more challenging. I’ve taken my sewing abilities and knowledge to the next level. The project was daunting, and hard…but it was so worth it.

Friends and followers, I am pleased to present you with the remainder of the photo shoot of V8519, in all it’s glory. Enjoy—you’ve earned it if you read through all my notes! Haha!

purple_1b    purple_5 purple_6 purple_7

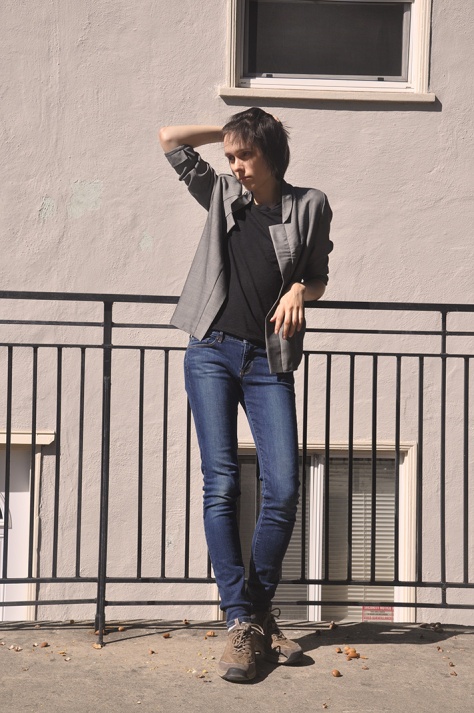
Completed: By Hand London Victoria Blazer: Cooling Down

DSC_0002

My favorite article both to sew and wear is outerwear, in all its glorious forms: blazers, jackets, or coats, zipped or buttoned, long or cropped, full sleeved or half-sleeved, tailored or minimalist.

In this case, the Victoria blazer is untailored, and even lacks interfacing. Shoulder pads? Nah. Buttons? Ew, no.  It is slouchy, oversized, and oh so very, very cool.

DSC_0004

The By Hand London ladies are a hoot. If you haven’t snapped up one of their patterns yet, do it, if only for the highly informative and entertaining instructions. These gals are punny. I’ve never seen anyone crack jokes in instructions before, and it’s refreshing .

The instructions are also geared toward absolute novices, so if you’re on of those I’ve-only-ever-made-like-one-skirt-and-I-never-let-it-see-the-light-of-day types, I highly recommend getting your feet wet with a BHL pattern. They’re fashionable without being obviously dated, they’re incredibly versatile, and they’re drafted for a good range of sizes.

DSC_0005

I’m already planning to make this blazer up in its various looks (the pattern also has options for a cropped version and a sleeveless version). Guys, this is gonna be a wardrobe staple. I love how I look in it. I love how confident/cool/detached I feel when I wear it. It’s like anarchy for my wardrobe. It’s great.

By the way, a reaction like this is a very good indication of what direction you should be taking your wardrobe in, if you’re the sort of person who curates or “architects” your wardrobe. While I wear quite a few cotton dresses in conversational prints (mostly because they’re easy to throw on in the morning and I get a lot of compliments at work), they don’t exactly do wonders for my self-confidence. I feel pretty normal, maybe cute, but also a bit…”home-made.” And I don’t really want to feel home-made. I want to feel like I ooze style, like someone can see a look and instantly say, “Oh man, Morgan would love that.” I want to reach the point where people are complimenting me on my style, not on my chosen sewing project.

But this untailored, oversized blazer? Heck yeah. Clearly, I need to start steering my wardrobe in a more minimalist direction (which, if any of you follow me on Pinterest, probably should have been obvious to me from the sheer number of pins I have on my “minimalist fashion inspiration” board.)

Now, onto the gritty details!

My only issue with the pattern is that it doesn’t call for lining the sleeves. I don’t know what sort of armor-plated skin the BHL ladies must have, but if you’re making a wool blazer, you DO NOT leave any part that is touching your skin unlined. Yeeeeeech. Fortunately, it was super easy to just throw in the sleeve lining, because the sleeves are finished with french cuffs.

French cuffs, by the way, are utterly genius little things. They’re like sexy facings, where instead of having to do 6 steps, you only do 2. A supremely elegant solution. The ex-researcher highly approves.

DSC_0007

But I have a confession to make:

I miss Midwestern autumns.

Back home, October was the perfect month for blazers and jackets.Temperatures in the 50’s and 60’s, crisp winds blowing in from the north, scattered showers.

Here in the Bay Area? It’s been a blistering 85+ for several days. A coworker of mine showed me a picture posted by a friend of hers from the L.A. area, in which the candles were melting from the ambient temperature. They were saggign against each other and the wall, and drooping onto the table from their candlesticks.

Anyway, the temperature is the reason for my expression above…haha.

At least I was only in the blazer and pants for the photoshoot–you can bet your bottom dollar I stripped and slipped on my airy rayon challis dress as soon as I was done taking pictures.

But whether or not the Bay Area weather cell is in denial, fall IS coming! So next up: coats! It’s been so hot I’ve hated even looking at the material for them, but they’re well on their way to being done, and soon enough the weather will warrant wearing them (YESSSSSSSS. Favorite season EVER.). I have a Gareth Pugh rip-off I’m making (looove sewing: designer fashion, fraction of the price!), and then I’ll start regularly posting along with the Ralph Rucci coat sewalong.  So stay tuned for season-appropriate sewing!

What are you guys sewing up for fall?

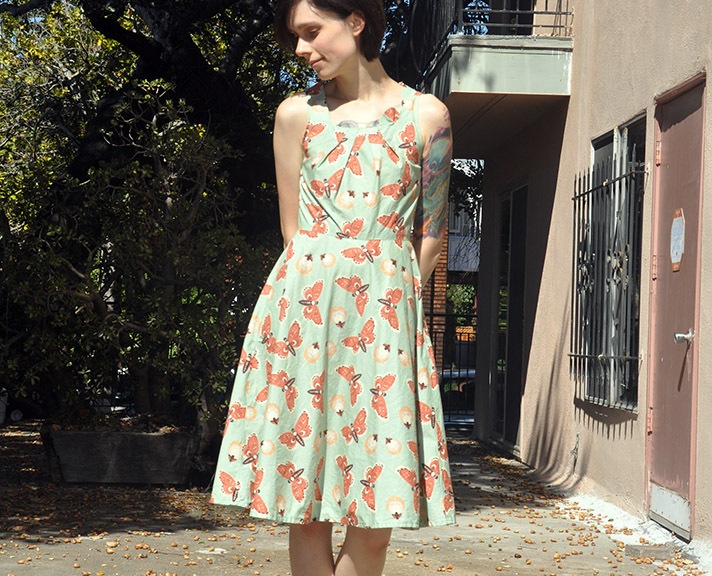
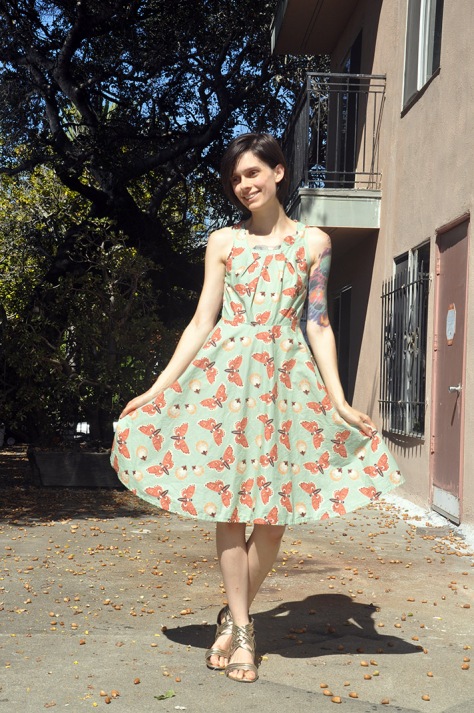
Completed: Moth Dress, and looking forward to fall makes!

DSC_0023

Happy Friday! Here’s the last of the dresses I made over the summer (that are worth photographing, anyway…tried quite a few patterns that didn’t pan out, derp).

DSC_0024

This dress is such a mashup of patterns and self-drafting that I can’t really attribute it to any one pattern. It was designed to showcase the fabric, which honestly is one of my favorite conversational prints from the fabric store I work at. It’s covered in moths and fireflies, and the colorway is a combination of vintage and rustic, using sage green, rust, terracotta, marigold, and cream.

There isn’t much to say about the construction of this dress, other than that it was gratifying, and that the dress is comfortable, and that I probably won’t reproduce it. I’m starting to move away from conversation prints and toward structural/architectural pieces, where loud prints like this one get in the way of showcasing the beauty of the construction and silhouette. These projects are all still in the works, though, so posts will be upcoming! Anyway, here’s a photoshoot, because I felt like it, and this is my blog, and I can subject you to half a dozen pictures of myself if I want to! 😀

DSC_0030 DSC_0032 DSC_0029 DSC_0028 DSC_0027 DSC_0026 DSC_0022

Stay tuned for my fall makes! Jackets, blazers, coats, yum yum yum!

Completed: Green Bee Frances Dress: Fun with St. George and Friends

I’m sorry. Really. I know I’m no model, but I couldn’t help it. I MEAN LOOK AT THIS DRESS. LOOK AT HOW LONG IT MAKES MY LEGS LOOK.

DSC_0015

Seriously, guys. I was not aware of how crazy-long my legs look.

I prefer a bit more modesty. I prefer skirts that at least hit the knee, because my work requires me to go up and down stairs, bend over, that sort of thing. And I don’t want people getting peeks, nor do I want to spend the entire day carefully monitoring my movements so that I’m not indecent. So I wear leggings at work, and people compliment me on my fun little tunic, and that’s that. But for a photo shoot?

DSC_0016

LOOK AT THIS SEXY LITTLE GEEK DRESS.

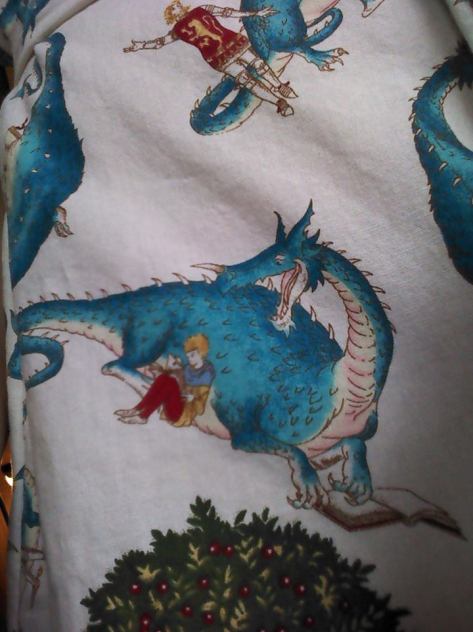
Actually, the reason why I’m pointing at myself like I’m about to fly apart at the seams from excitement is because of the cotton I used, which only adds to the geekiness:

st georgeLook! It’s St. George, and the dragon, and a little boy, AND THEY’RE FRIENDS. No one is killing each other! They’re just reading each other stories and eating apples and it’s adorable and happy and makes my day every time I look at it. ❤

DSC_0017 Now, onto more useful information: The pattern review!

The pattern? Honestly…it’s okay. It’s printed on opaque paper rather than tissue, which forces you to trace it out on your own tissue paper. This has both good and bad aspects: it might be a turn-off for people who want to whip up the dress in a day or a weekend, but it also ensures that you can come back to the pattern again and again, regardless of body changes.

Also, it’s drafted great for curvy ladies.But for a stick like me? I had to take INCHES out of the bust, and the only way to make this not look like a sack on me is to use the waist tie.

There were also a few things that didn’t make sense to me: like, for example, waist darts AND guide lines for elastic to be sewn straight onto the dress. Both? Really? Maybe this is a flattering thing to do for women with cups that overfloweth? I ended up omitting both and just using the waist tie, which works fine for me.

DSC_0018

The dress is also obviously made for women who are a few inches shorter than me. I’m 5’8”, by the way.

Also, the front placket has interfacing and two layers of fabric, which, when you include the seam allowance encased within the placket, makes for like 6 layers of fabric and a layer of interfacing. This is REALLY hard to rip with a seam ripper when making the buttonholes.

And speaking of buttonholes, protip: If your placket is narrow, make your button holes VERTICAL, not horizontal. /facepalm

DSC_0019

But there are some super cute details. The gathers in the center of the back, below the yoke. Also the gathers below the front yoke. Both are flattering details. The sleeves are also roomy, but the armhole isn’t gaping, so I have freedom of movement without having to worry about the awkward side-boob problem. Also, the buttons go low enough down the dress that you can, indeed, wear it as a dress, and aren’t forced to wear tights or leggings with it at all times.

DSC_0020

The dress was quite simple to put together though, and a gratifying project. Cute, doesn’t require a lot of yardage or materials, and versatile.I’ll probably shorten it by a few inches and make a few as shirts.

So, given what you see here, will you be making the Green Bee Frances dress?

Completed: Sewaholic Yaletown: Coneflower Confection

DSC_0005

Happy Friday! Have I mentioned how much I love Sewaholic patterns?

Because I am totally in love with Sewaholic patterns.

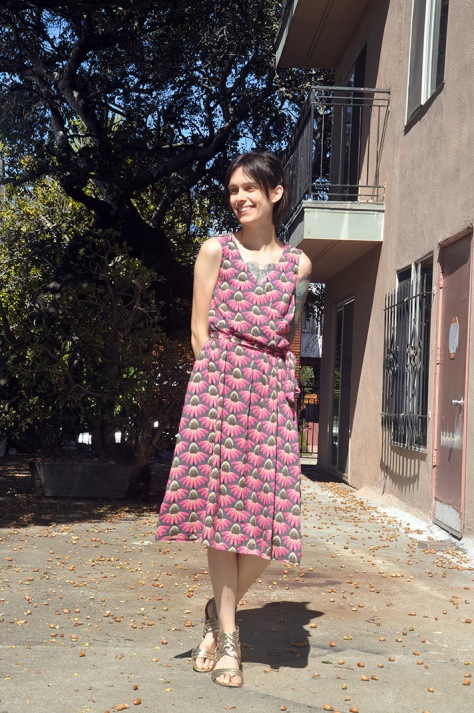
This is the Yaletown dress, though I made it without the sleeves…I made it out of a delicious coneflower rayon challis, and it was intended for hothothot weather…so no sleeves.

DSC_0006

This dress is fairly easy to throw together, and as always, Tasia’s instructions taught me something new. In this case, it was elastic casing. Tasia’s method is probably standard fare, but I read over the instructions before starting the casing and laughed aloud. “Genius!” I exclaimed. I had never thought to use the seam allowance as the casing!.

DSC_0008

So, yeah, I’ve been wearing this dress a lot. It’s super comfortable right out of the package (I DID have to do an SBA, but I always have to do one of those, so I hardly count it anymore), super flattering, and feminine without being ultrasweet. When I wore this dress the first time, a girl came up to me and said, “Can I just say? I don’t like your dress. I’m DROOLING over it.”

DSC_0014  It’s such a flowy, airy, comfortable style that I want to make another two or three and have it be a wardrobe staple–but it’ll have to wait until I can save up a little money and find a similarly good rayon challis. I have access to a wide variety of rayons at my workplace (woot woot independent fabric stores!) but they’re relatively transparent and I don’t like wearing bras.

What?

DSC_0009  I have another few dresses I’ll post about over the next week…stay tuned!

Simplicity 1802 & Simplicity 1606 Frankenpattern: Modern Art Museum Ready!

I know it’s been, like, FOREVER since I posted to my blog, but the reason was that my internet was working, and not that I haven’t been sewing!

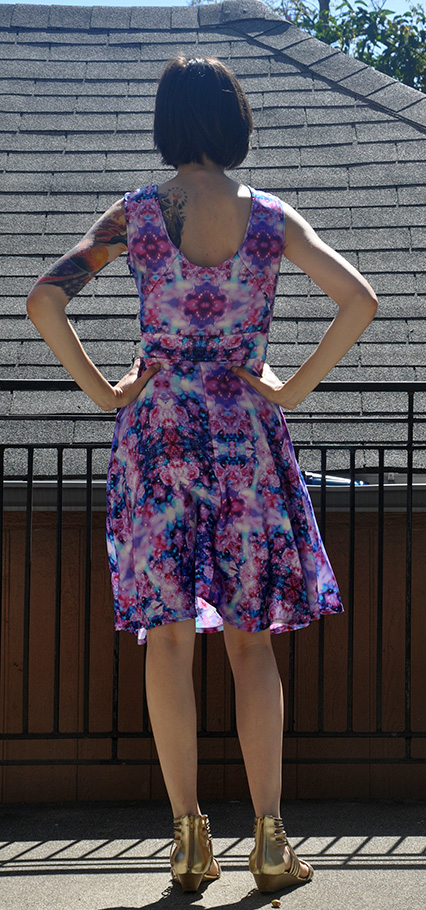
The best make is one I recently finished, a silk charmeuse dress made with a combination of Simplicity 1802 bodice and Simplicity 1606 skirt:

modart_front

See the grid-like pattern on the skirt? I wanted to create a focal point on the bodice, so I rearranged the bodice pieces on the material so that I wasn’t just creating random nonsense.

modart_front_coseup

It took forever and was a total pain in the butt and I’m never doing this insane of pattern matching EVER AGAIN EVER. Unless someone pays me at least, like, a hundred bucks from the get-go as a “pain in the patootie” fee.

modart_back

I made this dress for a trip I’m planning with my S.O. to a nearby modern art museum. We had to put the plan on hiatus, so I wasn’t able to take pictures of the dress in the museum itself (which is what I wanted…oh well). But I was fortunate enough to have a rare day off that was actually sunny, so I snapped a few quick shots anyway.

modart_back_closeup

What do you think? Is it modern-art-museum ready? What would YOU make to wear to a modern art museum?

Coming up next week, assuming my internet is still working: a runway copycat piece!